Hey guys!
The first week of 2013 has passed - have you already started to realize your New Year's resolution (if you made any), do you just feel brand new or do you think that the 1st of 2013 didn't make any difference?
I personally that the 1st day of the New Year was very different, everything felt brand new! : D
Whatever it may be, 2013 is definitely a new start and a lot of things will happen, hopefully a lot of good things! Though, as the year passes by we forget all the good things that happened (or if you're retarded like me you're forgetting stuff within a day XD) and that's why we gotta save these memories somewhere, for example, in a
♥ HAPPY MEMORY JAR ♥
You make one in January, write all the good things (even just little ones!) that happen on a piece of paper and put it in the jar. In December, you can empty the jar and read all the notes, so you remember how fun and a-some 2013 was! : D
This, what you see here is just an ordinary jar where once pickled veggies were stored in.
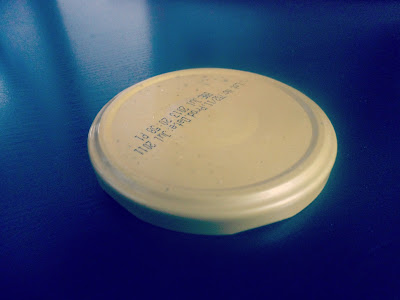
The jar also has a fitting lid, which obviously doesn't look very cute...
But, I'm gonna change that!
Let's get ready to....
◕ ◡ ◕ CUTIFY! ◕ ◡ ◕
To make this boring jar look dollicious, I've gathered some stuff I have at home, which will deifinetly help to doll this jar up!
- Adhesive foil with a cute flower pattern
- Adhesive gems
- Some ribbon bands
I'm going to wrap part of the jar in the decorative, adhesive foil to make it look less "naked".
For this step I simply roll it from the point I want the jar to be covered in foil.
Like this ↑
Then, I mark the point where I'm going to stick both ends together.
I take the jar off the foil to measure and connect the marked points.
Then, I simply cut along these lines.
When cut out, I take off the back foil and stick it over a normal A4 sheet. I do this because the foil alone would be too thin to stick it nice and even on the jar.
And por fin it looks like this ↑
Alright, these are double-faced adhesive tape squares, which are actually intended to be used for photos to be stuck in photo albums! But this time, I'll use it to stick on the decorative foil ; D
Like this ↑
And voilà, that boring jar looks already much nicer!
But, what about that unpretty looking jar lid? : O
See what I did there?
I just put the lid under the foil, draw around the top edge circle, cut the foil out out, paste it on paper and stick it on the jar lid. Then, I also decorated it with adhesive pearls to even out the border and make it look less plain! : D
Now, similar to what I did with the pearls, I'm going to even out the borders of the foil on the jar.
For this step I take a ribbon band, measure how long it should be to reach around the jar and stick the ends together.
Tadaaa! : D
Here you can see that I also tied a shiny, golden ribbon around the neck of the jar.
Now you can put your happy memory jar wherever you want, mine is right next to my bed! : D
You can get some note papers ready and put it next to the jar too. Whenever something good happens, write it down and put it in the jar!
I wrap my lucky New Year's penny in the note paper (yes the back side of the violet paper is white lol confuzzle) and hold it together with a cute, baby pink thread!
I hope you have fun and maybe even need a bigger jar, haha! ♥
Sweet Greetings and a happy New Year!
Venus
♥ FANGELICS WHO GOT INSPIRED TO MAKE A HAPPY MEMORY JAR TOO ♥
By @SosaSoska on Twitter
By @NeveAkram
By @noxiousgum on Twitter
By @HappyOliveHappy on Twitter!
If you want your pic to be featured too just let me know at venusangelic@gmail.com or on Twitter @VenusAngelic : D


